
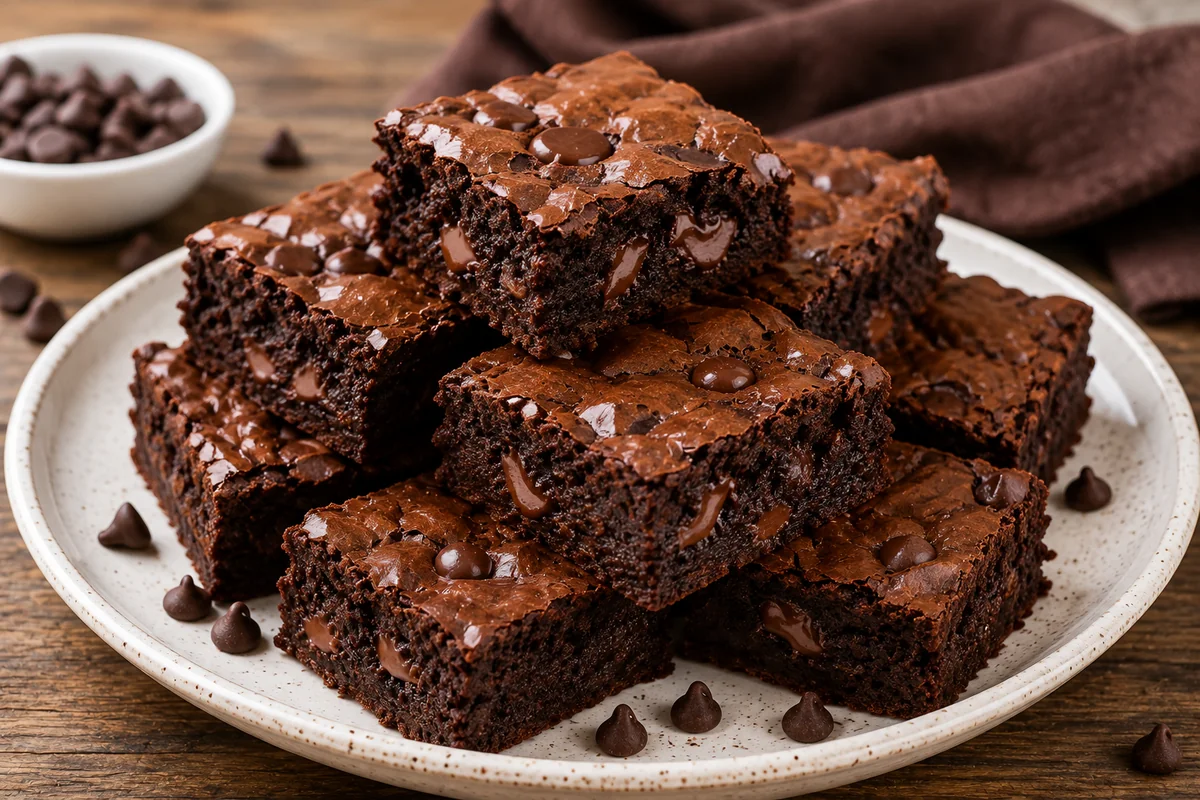
If you love rich chocolate desserts, this Classic Homemade Brownie Recipe from Scratch is an easy recipe to keep in your kitchen. These homemade brownies have a rich chocolate flavor, soft and fudgy centers, and slightly crisp edges. They are simple to make and do not require any special baking skills.
Making brownies from scratch is easier than you might think. You only need a few basic ingredients, one mixing bowl, and a baking pan. This recipe is perfect for beginners who want to make delicious homemade brownies without using a boxed mix.
Serve these brownies as an afternoon snack, a simple dessert after dinner, or a sweet treat for family and friends.
Why You Will Love These Homemade Brownies
These classic brownies are rich, chocolatey, and easy to prepare.
Here are a few reasons to try this recipe:
- Easy ingredients
- Simple preparation
- Rich chocolate flavor
- Soft and fudgy center
- Slightly crisp edges
- Beginner-friendly
- No boxed brownie mix
- Great for parties and family gatherings
- Easy to customize
The secret to good brownies is not overbaking them. You want the center to stay soft while the edges become firm and slightly crisp.
Ingredients You Need
For this Classic Homemade Brownie Recipe, you will need:
- ½ cup unsalted butter, melted
- 1 cup granulated sugar
- 2 large eggs
- 1 teaspoon vanilla extract
- ¾ cup all-purpose flour
- ½ cup unsweetened cocoa powder
- ¼ teaspoon salt
- ½ cup chocolate chips
- ½ cup chopped walnuts, optional
You can use semi-sweet or dark chocolate chips depending on how rich you want the brownies to taste.
If you do not like nuts, simply leave them out.
How to Make Brownies from Scratch
1. Preheat the Oven
Start by preheating your oven to 350°F (175°C).
Grease an 8 × 8-inch square baking pan with a little butter.
You can also line the pan with parchment paper. Leave some parchment hanging over two sides of the pan. This makes it easier to lift the brownies out after baking.
2. Melt the Butter
Place the butter in a microwave-safe bowl and melt it gently.
You can also melt the butter in a small saucepan over low heat.
Allow the melted butter to cool slightly before continuing.
The butter should be warm but not extremely hot.
3. Mix the Butter and Sugar
Pour the melted butter into a large mixing bowl.
Add the sugar and whisk until the mixture is well combined.
The mixture may look slightly grainy, which is normal.
The butter gives the brownies a rich flavor and helps create a soft texture.
4. Add the Eggs and Vanilla
Add the eggs one at a time.
Whisk gently after each egg until it is incorporated.
Add the vanilla extract and mix again.
Do not overmix at this stage.
The mixture should become smooth and slightly glossy.
Vanilla helps balance the strong chocolate flavor and gives the brownies a delicious aroma.
Mix the Dry Ingredients
5. Combine Flour and Cocoa
In a separate bowl, add:
- All-purpose flour
- Unsweetened cocoa powder
- Salt
Whisk the dry ingredients together until the cocoa powder is evenly distributed.
This helps prevent pockets of cocoa or salt from appearing in the finished brownies.
If your cocoa powder has lumps, sift it before mixing.
6. Combine Wet and Dry Ingredients
Gradually add the dry ingredients to the wet mixture.
Use a spatula or wooden spoon to gently fold everything together.
Stop mixing as soon as the flour disappears.
Do not overmix the brownie batter.
Overmixing can make brownies more cakey and less fudgy.
The batter should be thick and chocolatey.
Add Chocolate Chips and Nuts
7. Fold in the Chocolate
Add the chocolate chips to the brownie batter.
If you are using walnuts, add them now as well.
Gently fold everything together.
You can save a few chocolate chips to sprinkle over the top before baking.
Chocolate chips melt while the brownies bake and create delicious pockets of melted chocolate.
Prepare the Baking Pan
8. Transfer the Batter
Pour the brownie batter into the prepared baking pan.
Use a spatula to spread it evenly into the corners.
Sprinkle the remaining chocolate chips or chopped walnuts over the top if desired.
Try to make the surface as even as possible so the brownies bake evenly.
Bake the Brownies
9. Bake Until Done
Place the pan in the preheated oven.
Bake for about 25 to 30 minutes.
Start checking the brownies around the 25-minute mark.
Insert a toothpick into the center.
For fudgy brownies, the toothpick should come out with a few moist crumbs. It should not have a lot of wet batter, but it does not need to be completely clean.
Avoid overbaking the brownies because they will continue to firm up as they cool.
10. Let the Brownies Cool
Remove the brownies from the oven.
Place the pan on a cooling rack.
Allow the brownies to cool completely before cutting them.
This can take about 1 hour.
If you cut them while they are very hot, the center may look too soft and the pieces can fall apart.
For cleaner slices, you can place the cooled brownies in the refrigerator for a short time before cutting.
How to Cut Perfect Brownies
Once the brownies are completely cool, use a sharp knife to cut them into squares.
For cleaner cuts, wipe the knife with a damp cloth between slices.
You can make 9 large brownies or 16 smaller pieces depending on how you want to serve them.
If you like thick, bakery-style brownies, keep the pieces larger.
Tips for the Best Homemade Brownies
Use Good Cocoa Powder
The chocolate flavor depends heavily on the cocoa powder.
Use a good-quality unsweetened cocoa powder for the best results.
Do Not Overmix
Once you add the flour, mix gently.
Overmixing can develop gluten and make brownies firmer and more cake-like.
Do Not Overbake
This is one of the most important brownie tips.
If you want fudgy brownies, remove them from the oven when the center is just set and a toothpick comes out with a few moist crumbs.
Let Them Cool
Cooling helps brownies develop their final texture.
Freshly baked brownies are very soft, but they become easier to cut as they cool.
Use Parchment Paper
Parchment paper makes removing the brownies much easier.
You can lift the entire brownie slab from the pan and cut it on a cutting board.
Easy Brownie Variations
You can easily change this Classic Homemade Brownie Recipe from Scratch with different flavors and toppings.
Chocolate Walnut Brownies
Add chopped walnuts to the batter for a crunchy texture.
Pecans also work very well.
Double Chocolate Brownies
Add extra chocolate chips to the batter and sprinkle more over the top.
This is a great choice for serious chocolate lovers.
Peanut Butter Brownies
Add small spoonfuls of peanut butter over the brownie batter.
Use a knife to gently swirl it before baking.
Mint Chocolate Brownies
Add a small amount of peppermint extract to the batter for a fresh mint flavor.
You can also add mint chocolate chips.
Salted Brownies
Sprinkle a very small amount of flaky salt over the top before baking.
The salty flavor balances the sweetness and makes the chocolate taste richer.
How to Serve Homemade Brownies
These brownies taste delicious on their own, but you can make them even more special with a few simple toppings.
Try serving them with:
- Vanilla ice cream
- Whipped cream
- Fresh strawberries
- Chocolate sauce
- Caramel sauce
- Powdered sugar
- Fresh raspberries
Warm a brownie slightly and serve it with a scoop of vanilla ice cream for an easy homemade dessert.
The warm brownie and cold ice cream make a delicious combination.
How to Store Brownies
Allow the brownies to cool completely before storing them.
Place them in an airtight container.
Keep them at room temperature for about 3 to 4 days.
To keep the brownies soft, avoid leaving the container open for long periods.
You can also refrigerate them if you prefer a firmer texture.
Can You Freeze Homemade Brownies?
Yes, brownies freeze very well.
Cut the brownies into individual pieces and wrap each piece tightly in plastic wrap.
Place the wrapped brownies in a freezer-safe bag or container.
They can be frozen for about 2 to 3 months for the best quality.
When you want to enjoy one, let it thaw at room temperature.
You can also warm it gently in the microwave for a soft and gooey texture.
Frequently Asked Questions
Why are my brownies too dry?
The most common reasons are overbaking or using too much flour. Measure the flour carefully and remove the brownies when a toothpick has a few moist crumbs.
How do I make fudgy brownies?
Use enough butter and cocoa, avoid overmixing the batter, and do not overbake the brownies. Letting them cool also helps create a fudgy texture.
Can I use oil instead of butter?
Yes, but butter gives these brownies a richer flavor. If you use oil, the texture may be slightly different.
Can I add chocolate chunks?
Absolutely. Chocolate chunks work very well and create larger pockets of melted chocolate.
Can I make brownies without nuts?
Yes. Nuts are completely optional. You can leave them out or replace them with extra chocolate chips.
Why did my brownies become cakey?
Overmixing the batter or baking the brownies for too long can create a more cake-like texture. For fudgy brownies, mix gently and watch the baking time carefully.
Final Thoughts
This Classic Homemade Brownie Recipe from Scratch is an easy way to make rich and delicious chocolate brownies at home. You do not need a boxed mix or complicated equipment. A few simple ingredients and a little baking time are all you need.
For the best results, use good-quality cocoa powder, avoid overmixing the batter, and do not overbake the brownies. Let them cool completely before cutting so they can develop a soft and fudgy texture.
You can enjoy these brownies plain or add walnuts, chocolate chips, peanut butter, caramel, or your favorite toppings.
Whether you are making dessert for your family, preparing a sweet snack, or baking for guests, these homemade brownies are a simple recipe worth keeping. Classic Homemade Brownie Recipe.
Easy Chocolate Fudge Cake Recipe | Homemade Cake
USDA Food Safety and Inspection Service