
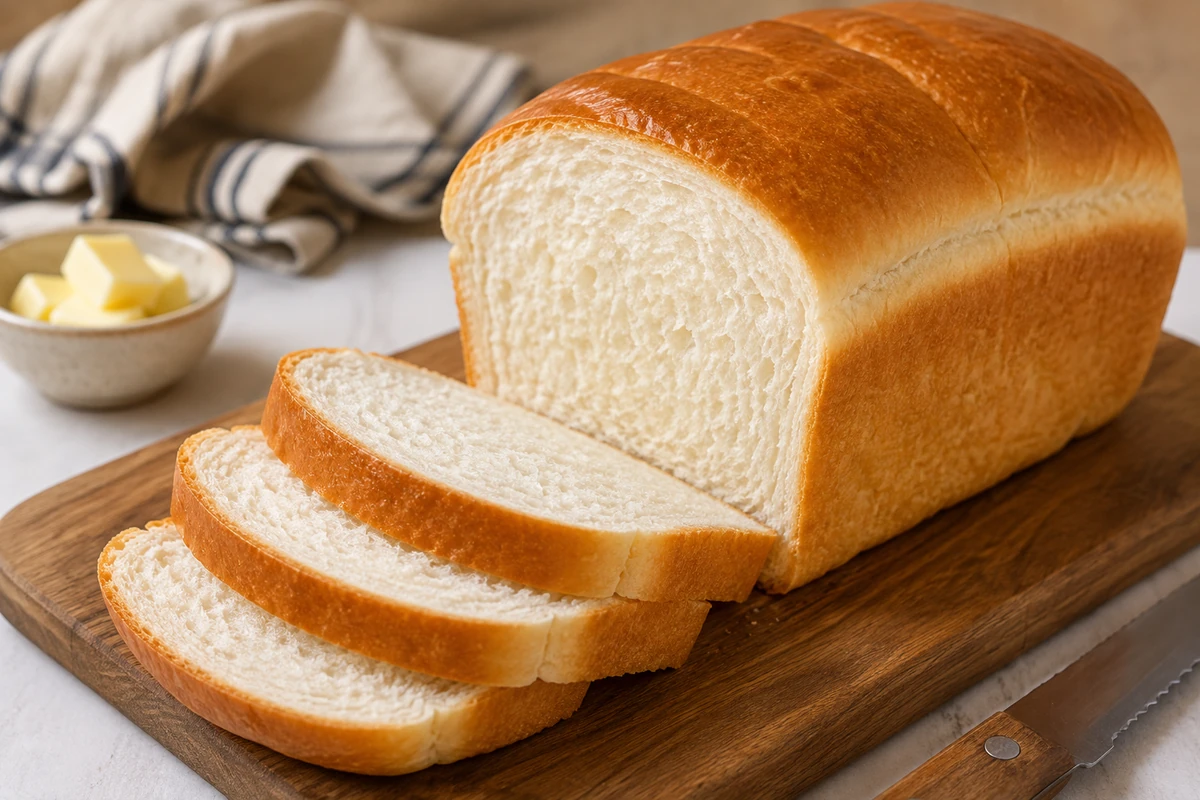
There is nothing quite like the smell of fresh bread coming from the oven. This Easy Homemade White Bread Recipe for Beginners gives you a soft, fluffy loaf with a lightly golden crust and a simple homemade flavor.
If you have never made bread before, do not worry. This recipe uses basic ingredients and easy steps. You do not need expensive equipment or advanced baking skills. With a little patience, you can make a beautiful loaf of white bread right in your own kitchen.
Homemade bread is perfect for breakfast, sandwiches, toast, or a simple snack with butter and jam. Once you learn this basic recipe, you can also use the same method to make different types of bread.
Why You Will Love This Homemade White Bread
This recipe is a great starting point for beginner bakers.
- Easy ingredients
- Simple instructions
- Soft and fluffy inside
- Light golden crust
- Great for sandwiches
- Delicious when toasted
- Perfect for breakfast
- Beginner-friendly recipe
- No complicated equipment needed
The most important part of making homemade bread is giving the yeast enough time to work. Do not rush the rising steps because they help create a light and fluffy loaf.
Ingredients You Need
For this Easy Homemade White Bread Recipe, you will need:
- 3 cups all-purpose flour
- 1 cup warm water
- 2 tablespoons granulated sugar
- 2 ¼ teaspoons active dry yeast
- 1 teaspoon salt
- 2 tablespoons unsalted butter, melted
- 2 tablespoons milk
Make sure the water feels warm but not hot. Very hot water can damage the yeast and prevent the bread from rising properly.
You can use bread flour instead of all-purpose flour if you have it. Bread flour can give the loaf a slightly chewier texture.
How to Make Homemade White Bread
1. Activate the Yeast
Start by adding warm water to a large mixing bowl.
Add the sugar and active dry yeast. Stir gently and let the mixture sit for about 5 to 10 minutes.
The yeast should become slightly foamy on the surface.
If there is no foam after several minutes, your yeast may not be active. Check the expiration date and try again with fresh yeast.
This step is important because active yeast helps the bread rise.
2. Add the Butter and Milk
Once the yeast mixture becomes foamy, add the melted butter and milk.
Stir everything together until combined.
Make sure the melted butter has cooled slightly before adding it. Very hot butter can affect the yeast.
3. Add the Flour and Salt
Add about 2 cups of flour to the bowl and mix gently.
Then add the salt.
Gradually add the remaining flour while mixing.
The dough should start to come together and become soft.
Do not add all the flour at once. Depending on the humidity and type of flour, you may need slightly more or less flour.
The dough should feel soft and slightly tacky but should not be extremely sticky.
Knead the Dough
4. Knead by Hand
Place the dough on a lightly floured surface.
Knead it for about 8 to 10 minutes.
Push the dough forward with the palm of your hand, fold it back, and turn it slightly. Repeat this process until the dough becomes smooth and elastic.
You can also use a stand mixer with a dough hook if you have one.
Good kneading helps develop gluten, which gives homemade bread its structure and soft texture.
Do not worry if the dough feels a little sticky at first. Avoid adding too much flour because this can make the finished bread heavy and dry.
Let the Dough Rise
5. First Rise
Place the kneaded dough in a lightly greased bowl.
Turn the dough once so the surface has a thin coating of oil or butter.
Cover the bowl with a clean kitchen towel or plastic wrap.
Place it in a warm area and let it rise for about 1 to 1½ hours.
The dough should become about twice its original size.
The rising time can change depending on the temperature of your kitchen. A warm kitchen usually helps the dough rise faster.
6. Check the Dough
When the dough has doubled in size, gently press one finger into it.
If the indentation slowly remains, the dough is ready for the next step.
Do not worry if the dough takes a little longer than expected. Yeast bread often rises more slowly in a cool kitchen.
Shape the Bread
7. Remove the Air
Gently press the dough down to release some of the large air bubbles.
Do not knead it aggressively again.
Place the dough on a lightly floured surface and shape it into a rectangle.
8. Roll and Shape
Starting from one short side, roll the dough tightly into a loaf.
Pinch the seam closed with your fingers.
Place the shaped dough into a greased 9 × 5-inch loaf pan, seam side down.
Make sure the dough sits evenly inside the pan.
Let It Rise Again
9. Second Rise
Cover the loaf pan with a clean towel.
Let the dough rise again for about 30 to 45 minutes.
The dough should rise above the edge of the pan or come close to it.
This second rise helps create a softer and lighter loaf.
While the dough rises, preheat your oven to 375°F (190°C).
Bake the Bread
10. Brush the Top
Before baking, lightly brush the top of the dough with a little milk or melted butter.
This helps create a beautiful golden surface.
You can leave the loaf plain or sprinkle a few sesame seeds on top if you like.
11. Bake Until Golden
Place the loaf in the preheated oven.
Bake for approximately 30 to 35 minutes.
The top should become golden brown.
The bread should sound slightly hollow when you gently tap the top.
If the top becomes dark too quickly, loosely cover it with aluminum foil during the final part of baking.
12. Cool the Bread
Remove the loaf from the oven.
Let it cool in the pan for about 10 minutes.
Then carefully remove it from the pan and place it on a wire rack.
Allow the bread to cool for at least 30 to 60 minutes before slicing.
Cutting bread while it is very hot can make the inside gummy or cause the loaf to lose its shape.
Tips for Soft Homemade White Bread
Use Warm Water
The water should feel comfortably warm, not hot.
Water that is too hot can kill the yeast.
Do Not Use Too Much Flour
Adding too much flour can make the bread dense and dry.
The dough should be soft and slightly tacky while you knead it.
Give the Dough Enough Time
Bread needs time to rise.
Do not judge the dough only by the clock. Look for the dough to become noticeably larger and airy.
Knead Properly
Kneading develops the gluten that gives the loaf its structure.
If you knead by hand, give the dough enough time to become smooth and elastic.
Do Not Slice Too Early
Fresh bread smells amazing, but try to wait before cutting it.
Cooling allows the inside to finish setting and makes slicing easier.
Easy Variations
Once you are comfortable with this basic recipe, you can try a few simple changes.
Honey White Bread
Replace the sugar with honey for a slightly different flavor.
Garlic Butter Bread
Brush the baked loaf with melted butter mixed with a little garlic and dried herbs.
Herb Bread
Add dried herbs such as oregano, parsley, or rosemary to the dough.
Cheesy Bread
Add a small amount of shredded cheese to the dough for a savory homemade loaf.
Soft Sandwich Bread
For extra soft slices, brush the top of the hot loaf with melted butter immediately after baking.
How to Store Homemade White Bread
Allow the bread to cool completely before storing it.
Place the loaf in an airtight bread bag or container and keep it at room temperature.
For the best texture, enjoy the bread within 2 to 3 days.
Avoid storing fresh bread in the refrigerator unless necessary. Refrigeration can make bread become stale faster.
If you cannot finish the loaf within a few days, freezing is a better option.
Can You Freeze Homemade Bread?
Yes, homemade white bread freezes well.
Allow the loaf to cool completely before freezing.
You can freeze the whole loaf or slice it first.
Wrap the bread tightly in plastic wrap or foil, then place it in a freezer-safe bag.
When you want to use it, allow the bread to thaw at room temperature.
Sliced bread can also go directly into a toaster after freezing.
How to Serve Homemade White Bread
Fresh homemade white bread is delicious in many simple ways.
You can serve it with:
- Butter
- Jam
- Honey
- Peanut butter
- Scrambled eggs
- Cheese
- Soup
- Fresh vegetables
For breakfast, toast two slices and add butter and your favorite jam.
You can also use this bread for sandwiches, grilled cheese, French toast, or simple bread-and-butter snacks.
Frequently Asked Questions
Why did my bread not rise?
The yeast may be inactive, the water may have been too hot or too cold, or the dough may have been kept in a very cool place. Give the dough enough time and use fresh yeast.
Why is my homemade bread dense?
Too much flour, insufficient kneading, or not enough rising time can make bread dense. Keep the dough soft and allow it to rise properly.
Can I use instant yeast?
Yes. Instant yeast can usually be mixed directly with the flour, although you can also use it with the warm water if you prefer.
Can I make this bread without a stand mixer?
Absolutely. You can knead the dough by hand. It takes a little more effort but works very well.
How do I know when the bread is done?
The loaf should have a golden-brown top and sound slightly hollow when tapped. If you use a kitchen thermometer, the center should reach around 190°F (88°C).
Can I make the dough ahead of time?
Yes. You can prepare the dough and keep it covered in the refrigerator for a slower rise. Let it come closer to room temperature before shaping and baking.
Final Thoughts
This Easy Homemade White Bread Recipe for Beginners is a great way to start baking bread at home. The ingredients are simple, the steps are easy to understand, and the result is a soft loaf with a golden crust.
The key is to give the yeast enough time, knead the dough properly, avoid adding too much flour, and let the loaf cool before slicing.
Once you become comfortable with this basic recipe, you can experiment with herbs, cheese, garlic butter, honey, or other flavors.
Serve your homemade bread with butter and jam for breakfast, use it for sandwiches, or enjoy it warm alongside soup. Fresh bread made at home is simple, comforting, and worth the little bit of time it takes to prepare.
Easy Chocolate Fudge Cake Recipe | Homemade Cake
USDA Food Safety and Inspection Service