
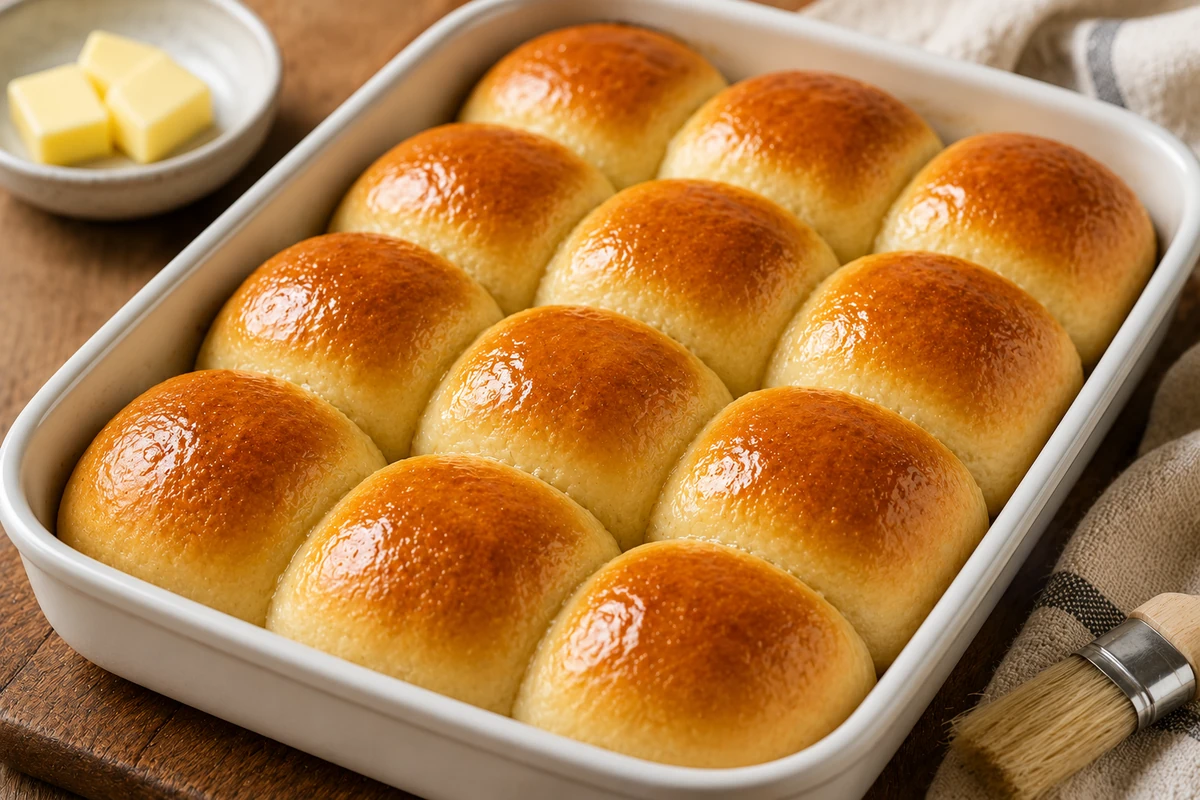
There is nothing better than warm, soft bread served with a homemade dinner. These Easy Homemade Dinner Rolls Recipe from Scratch are soft, fluffy, buttery, and simple enough for beginner bakers. You only need a few basic ingredients and some patience while the dough rises.
Homemade dinner rolls are perfect for family dinners, holidays, soups, pasta, roasted chicken, and special gatherings. They taste much better when served warm with a little butter.
This recipe gives you light and fluffy rolls with a soft center and a golden top. Once you learn how easy they are to make, you may want to bake them regularly.
Why You Will Love These Dinner Rolls
These homemade dinner rolls are simple, delicious, and perfect for beginners.
Here are a few reasons to try them:
- Soft and fluffy texture
- Simple ingredients
- Easy preparation
- Beginner-friendly recipe
- Delicious buttery flavor
- Perfect for family dinners
- Great for holidays and gatherings
- Easy to prepare ahead
- Freezer-friendly
The most important part of making soft dinner rolls is giving the dough enough time to rise. Do not rush the rising process because it helps create the light texture you want.
Ingredients You Need
For this Easy Homemade Dinner Rolls Recipe, you will need:
- 3 ½ cups all-purpose flour
- 1 cup warm milk
- 2 ¼ teaspoons active dry yeast
- 2 tablespoons granulated sugar
- 1 teaspoon salt
- 1 large egg
- 3 tablespoons unsalted butter, melted
- 1 tablespoon melted butter for brushing
The milk should be warm, not hot. Very hot milk can damage the yeast and prevent the dough from rising properly.
You can use bread flour instead of all-purpose flour if you prefer. Bread flour may give the rolls a slightly chewier texture.
How to Make Homemade Dinner Rolls
1. Activate the Yeast
Pour the warm milk into a large mixing bowl.
Add the sugar and active dry yeast. Stir gently and let the mixture sit for about 5 to 10 minutes.
The mixture should become slightly foamy.
This shows that the yeast is active. If you do not see any foam, the yeast may be old or the milk may have been too hot or too cold.
Using active yeast is important because it helps the rolls become soft and fluffy.
2. Add the Wet Ingredients
Once the yeast mixture becomes foamy, add the egg and melted butter.
Whisk gently until everything is combined.
Make sure the melted butter is slightly cool before adding it to the mixture.
The egg adds richness to the dough, while the butter helps create soft and flavorful dinner rolls.
3. Add the Flour and Salt
Add about 2 cups of flour to the bowl and mix gently.
the salt and continue mixing.
Gradually add the remaining flour until a soft dough begins to form.
Do not add all the flour at once. You may need slightly more or less flour depending on the type of flour and the moisture in your kitchen.
The dough should be soft and slightly sticky, but it should not be wet.
Knead the Dough
4. Knead Until Smooth
Transfer the dough to a lightly floured surface.
Knead it for about 8 to 10 minutes.
Push the dough forward with the palm of your hand, fold it back, and turn it slightly. Continue this process until the dough becomes smooth and elastic.
You can also use a stand mixer with a dough hook if you have one.
Try not to add too much flour while kneading. A soft dough helps create softer rolls.
The dough should become easier to handle as you continue kneading.
Let the Dough Rise
5. First Rise
Place the kneaded dough in a lightly greased bowl.
Turn the dough once so the surface has a thin coating of oil or butter.
Cover the bowl with a clean kitchen towel or plastic wrap.
Place the bowl in a warm area and let the dough rise for about 1 to 1½ hours.
The dough should become about twice its original size.
The exact rising time depends on the temperature of your kitchen. If your kitchen is cool, the dough may need more time.
Do not worry if it takes longer than expected. The size of the dough matters more than the exact time.
Shape the Dinner Rolls
6. Divide the Dough
Once the dough has doubled in size, gently press it down to remove some of the large air bubbles.
Place it on a lightly floured surface.
Divide the dough into 12 equal pieces.
Try to keep the pieces similar in size so they bake evenly.
7. Shape the Rolls
Take one piece of dough and gently pull the edges toward the center.
Turn it over and roll it between your hands to create a smooth ball.
Repeat with the remaining pieces.
Place the shaped rolls in a lightly greased 9 × 13-inch baking dish.
Leave a little space between each roll. They will expand during the second rise and baking.
Let the Rolls Rise Again
8. Second Rise
Cover the baking dish with a clean kitchen towel.
Let the rolls rise for about 30 to 45 minutes.
They should look puffy and slightly larger.
While the rolls are rising, preheat your oven to 375°F (190°C).
The second rise is important because it helps create a light and airy texture.
Avoid skipping this step, even if the rolls already look large after the first rise.
Bake the Dinner Rolls
9. Brush with Butter
Before placing the rolls in the oven, brush their tops lightly with melted butter.
This adds flavor and helps create a beautiful golden finish.
You can also brush them with butter immediately after baking for an extra soft and buttery top.
10. Bake Until Golden
Place the baking dish in the preheated oven.
Bake the rolls for about 18 to 22 minutes.
The tops should become lightly golden brown.
Try not to overbake them. Too much baking can make the rolls dry instead of soft.
When they are ready, remove the baking dish from the oven and place it on a cooling rack.
Make Extra-Soft Dinner Rolls
If you want especially soft rolls, brush them with melted butter as soon as they come out of the oven.
Cover them loosely with a clean kitchen towel for a few minutes.
The trapped warmth helps keep the tops soft.
Serve them warm with butter for the best flavor.
Tips for Perfect Homemade Dinner Rolls
Use Warm Milk
The milk should feel warm to the touch but not hot.
Very hot liquid can kill the yeast.
Do Not Add Too Much Flour
Adding too much flour is one of the easiest ways to make dinner rolls dense.
Keep the dough soft and slightly tacky while kneading.
Give the Dough Enough Time
Do not rush the rising process.
If the dough has not doubled in size, give it more time.
Knead Properly
Kneading helps develop gluten, which gives the rolls their structure.
The dough should become smooth and elastic after kneading.
Make Equal-Sized Rolls
Try to divide the dough evenly.
This helps all the rolls finish baking at about the same time.
Avoid Overbaking
Watch the rolls during the final few minutes.
They should be lightly golden rather than dark brown.
Easy Dinner Roll Variations
You can easily change this Easy Homemade Dinner Rolls Recipe from Scratch with a few simple ingredients.
Garlic Butter Rolls
Mix melted butter with minced garlic and brush it over the warm rolls.
Add a little chopped parsley for extra flavor.
Herb Dinner Rolls
Add dried rosemary, oregano, or parsley to the dough.
These rolls are delicious with soups and roasted chicken.
Honey Dinner Rolls
Replace some of the sugar with honey for a slightly sweeter flavor.
Cheesy Dinner Rolls
Add a small amount of shredded cheese to the dough or sprinkle cheese over the tops before baking.
Whole Wheat Rolls
Replace part of the all-purpose flour with whole wheat flour.
Start with a small amount because using too much whole wheat flour can make the rolls heavier.
How to Store Dinner Rolls
Allow leftover rolls to cool completely.
Place them in an airtight container or bread bag.
Keep them at room temperature and enjoy them within 2 to 3 days for the best texture.
To warm them again, place them in a warm oven for a few minutes.
You can also microwave one roll for a few seconds.
Can You Freeze Homemade Dinner Rolls?
Yes, dinner rolls freeze very well.
Allow baked rolls to cool completely.
Place them in a freezer-safe bag or container and remove as much air as possible.
You can freeze them for up to 2 to 3 months for the best quality.
When you want to eat them, let them thaw at room temperature and warm them in the oven.
You can also freeze shaped, unbaked rolls before the final rise. Thaw them in the refrigerator, let them rise until puffy, and then bake as directed.
What to Serve with Dinner Rolls
These soft homemade rolls work with almost any meal.
Serve them with:
- Roast chicken
- Beef stew
- Tomato soup
- Creamy soup
- Pasta
- Mashed potatoes
- Roasted vegetables
- Thanksgiving-style dinners
- Salads
Warm dinner rolls are especially good with butter, honey, or homemade jam.
They are also great for making small sandwiches with leftover chicken or turkey.
Frequently Asked Questions
Why are my dinner rolls not fluffy?
The yeast may not be active, the dough may need more rising time, or you may have added too much flour. Make sure the yeast is fresh and keep the dough soft.
Can I make these rolls without a mixer?
Yes. You can easily knead the dough by hand. You only need a clean work surface and a little patience.
Can I use instant yeast?
Yes. Instant yeast works well for this recipe. You can mix it directly with the flour or use it with the warm milk.
Why did my rolls become hard?
Overbaking or adding too much flour can make rolls hard. Bake them only until lightly golden and avoid using more flour than necessary.
Can I prepare dinner rolls ahead of time?
Yes. You can prepare the dough ahead and refrigerate it for a slower rise. You can also freeze baked rolls for later.
Final Thoughts
This Easy Homemade Dinner Rolls Recipe from Scratch is a simple way to make soft, fluffy bread at home. With basic ingredients and a little patience, even beginner bakers can make delicious dinner rolls.
Remember to use active yeast, keep the dough soft, knead it properly, and give it enough time to rise. These simple steps make a big difference in the final texture.
Serve the rolls warm with butter alongside soup, pasta, roasted chicken, or your favorite family meal. You can also add garlic, herbs, cheese, or honey to create your own version.
Once you try these homemade dinner rolls, you may find that making fresh bread at home is easier than you expected.
Easy Chocolate Fudge Cake Recipe | Homemade Cake
USDA Food Safety and Inspection Service